 |
Wobbly Life Mod SDK
|

|
|
Wobbly Life Mod SDK
|
|
Note: We assume you have followed Creating a Mod before starting this example
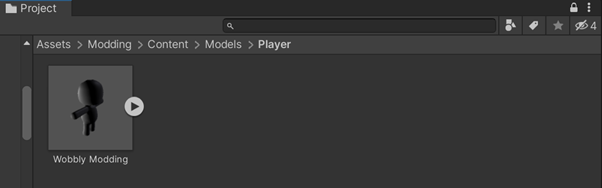
The first step to creating your own clothing will be finding the Wobbly Modding.fbx file from within the mod SDK.
It can be found in Assets > Modding > Content > Models > Player
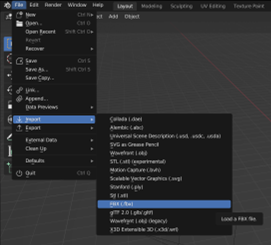
You will then need to import this model into Blender.
Open a new blender file and go to File/Import/FBX and locate where your Wobbly Modding.fbx file is
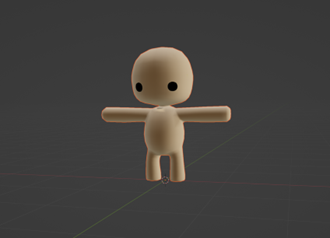
After Importing you should a Wobbly in your scene
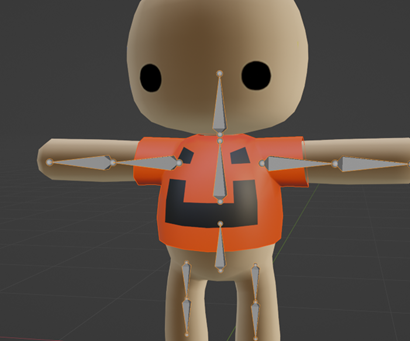
The next step is to model up your clothes!
Make the clothing pieces separate meshes from the Wobbly mesh and remember to separate Hats Shirts and Pants.
I will show you how to make a really simple shirt but if you want more information on how to model in blender there are lots of great free tutorials on YouTube.
A really simple way to start your model is to select faces on the wobbly themselves and detach them onto their own model. Then you can use the shrink/flatten tool to enlarge your clothes so they are not flat against the wobbly.

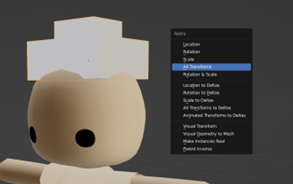
This isn’t the only way to start your clothing model, you can model from a completely new mesh if you want. However this way the skinning data from the Wobbly Mesh will be carried over.
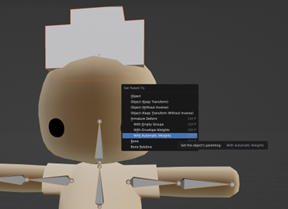
If you do model your clothing from scratch make sure to apply all transforms (Ctrl A > All Transforms) so that the pivot point is at 0:0.
And make sure to parent your clothing piece to the armature. (Select Clothing then armature Ctrl P)
Once you clothing Piece is Modelled its time for textureing.
You can find loads of great tutorials on how to do this on YouTube.
You can unwrap and texture your clothes however you like.
With your clothing finalised its time to get it into Unity!
Make sure to select both the Armature and the Clothing model. (Only 1 piece)
And go to File > Export > FBX
Save it somewhere in your mod project, usually in a models folder.

And make sure to use these export settings so that everything will be imported correctly.

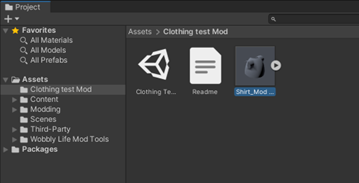
You should now be able to find your clothing in your project.
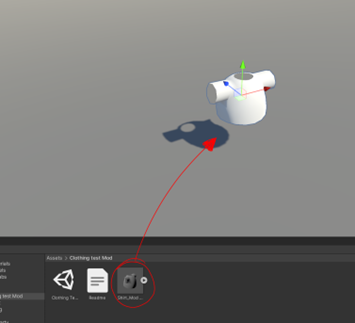
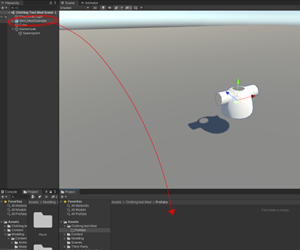
Now drag your model from the project window into the scene view.
We now want to prefab our clothes model, to do this we reverse the last step. Dragging our object from the scene Hierarchy into our project window, it may be best to keep your prefabs in their own folder.
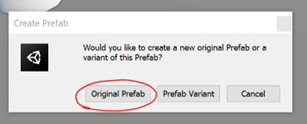
When you do this is will ask you if your want to create an orgional prefab or a prefab varient. Pick original prefab.
Now you should see your prefab in the project window.
Double click on the prefab to open it.

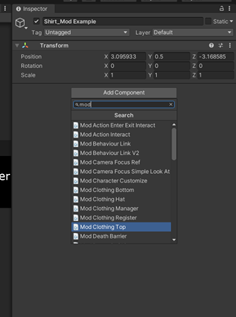
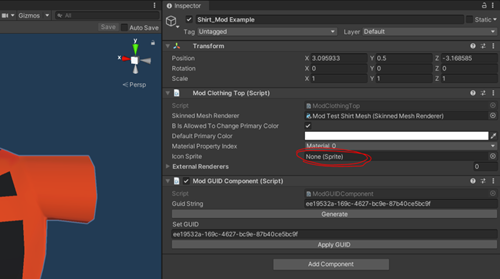
With your prefab opened add a new component to the parent object called “Mod Clothing Top”
(or “Mod Clothing Hat”, or “Mod Clothing Bottom” depending on what clothing type you have added)
You will see in the component an option for “Skinned Mesh Renderer”
You will need to asign the mesh renderer from within the prefab.
Drag the Object with the skinned mesh renderer from the hierarchy into this option.
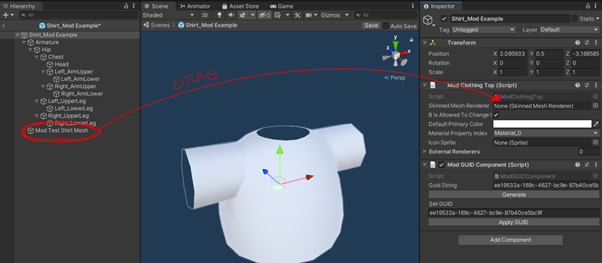
Your Skinned mesh Renderer Object will be names after whatever you named the object within blender.
Click on the Skinned Mesh Renderer Object.
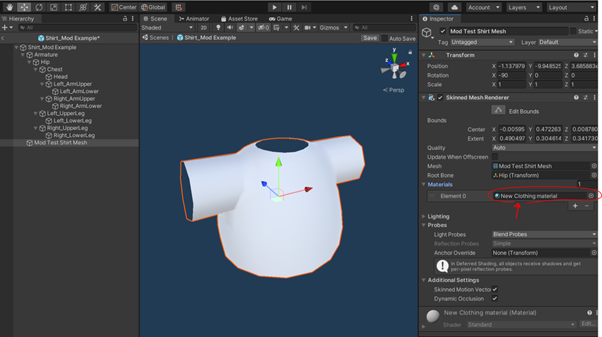
Here you will find the option to add a material to your clothes.
**(Notes: To utilise changing colour of clothing you must have a shader that has access to the property _ReplaceColor for an example please look at the TrashZone Example Shader “WobblyClothes” for more details.)**
To add a sprite so that your clothes will have an icon inside the wardrobe menu assign it on the Mod Clothing Top script here:
Now your clothing is created lets make sure the Wobbly wears it when you start your mod.
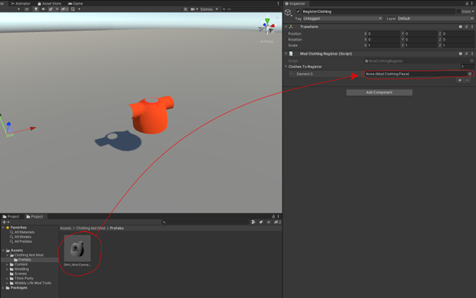
Back in your scene view create a new empty game object and call it “RegisterClothing”
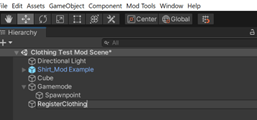
On this Game Object add the component “Mod Clothing Register”
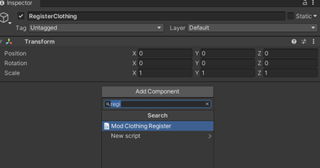
On this component you will see a dropdown option for clothes to register. Open up the drop down and click the little + to add a new clothing option. Now drag your prefab into this option to assign it.
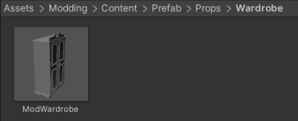
That should be everything to make your clothing work! To test this out we can add a wardrobe to the scene.
You can find the wardrobe in the mod SDK under Assets > Content > Prefab > Props > Wardrobe
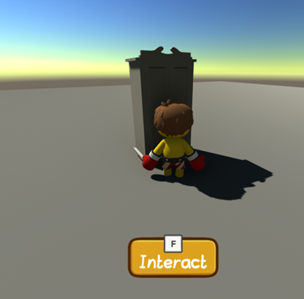
Place this prefab somewhere in your scene and make sure that “Show only unlocked clothes” in the Mod Wardrobe component is unticked so that you can access your clothing.
Now if you test your mod (See Testing Mod for more information) And interact with the wardrobe.
We can see that our clothing appears in the wardrobe clothing list!
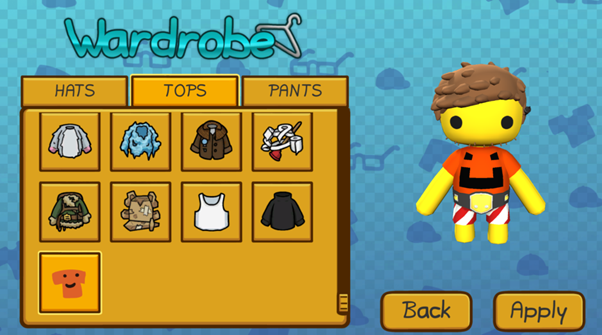
And there you have it, you should now have the basics to add your own clothing in your mod.